> For the complete documentation index, see [llms.txt](https://docs.influxtechnology.com/support_guides/llms.txt). Markdown versions of documentation pages are available by appending `.md` to page URLs; this page is available as [Markdown](https://docs.influxtechnology.com/support_guides/dialog-user-guide/quick-start-guide/log-data-using-uds-in-dialog-software.md).
# Log data using UDS in DiaLog Software
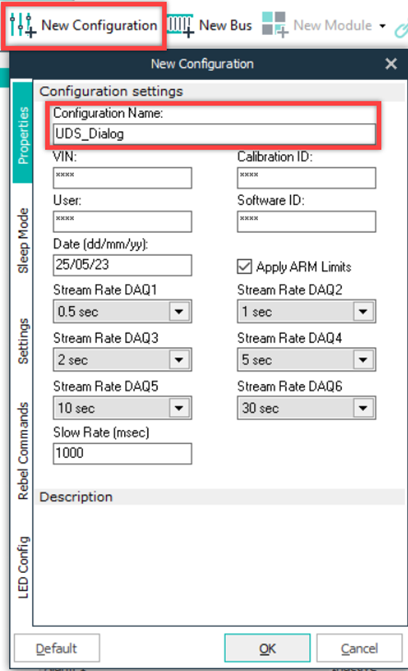
Begin creating a new configuration by clicking on the 'New Configuration' tab and specifying the name for the configuration.
While performing this step, check the sleep mode settings to avoid battery drain.
* Use the drop-down menu to select the required mode.
* Ensure that the 'Limit Module Wakeup' is not enabled, and then select 'OK'.

Click on 'New Bus', select 'CAN 0 (HS) (select CAN 0 if using Influx OBD cable) from the drop-down menu and click 'OK'.

Select the drop-down CAN /bus speed menu, allocate the correct bus speed that matches your CAN network requirement, and then select 'OK'.

Click on 'New Protocol'.
Select 'Diagnostics' from the displayed choices, and click 'OK'.

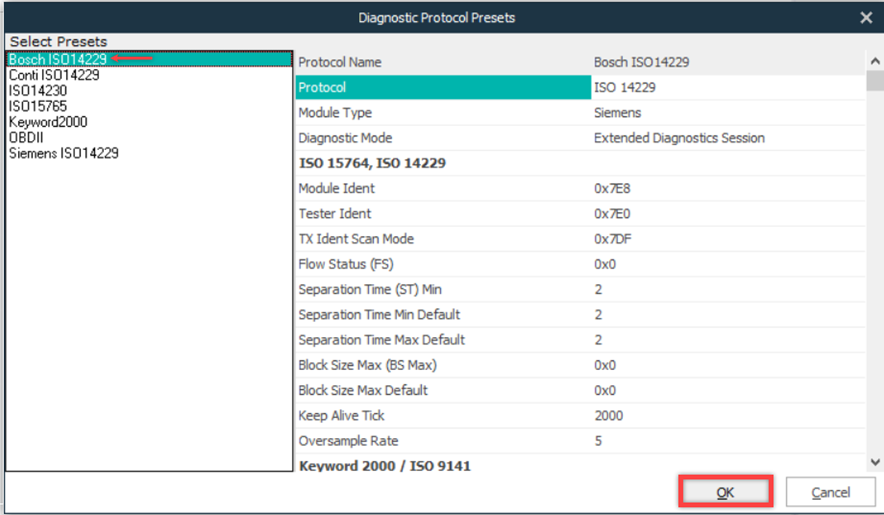
Choose the desired ISO 14229 from the listed options and click 'OK'.
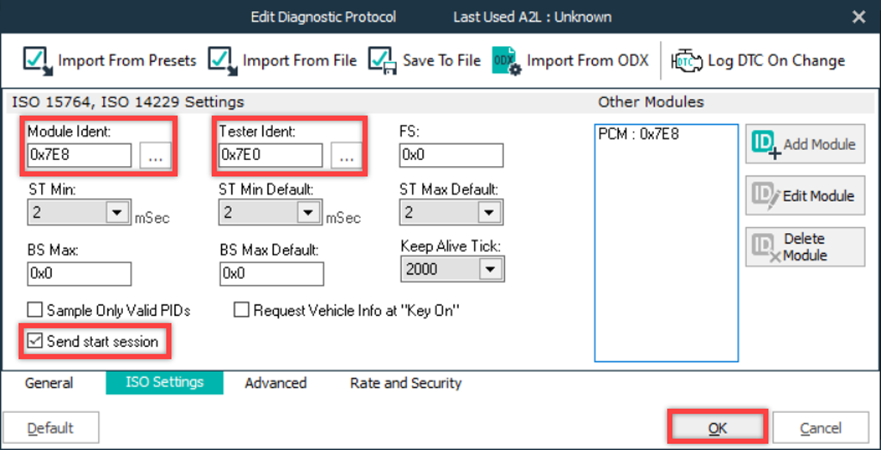
Enter the Module and tester identifiers for the selected module, make sure to check the box in front of 'Send start session' and click 'OK'.
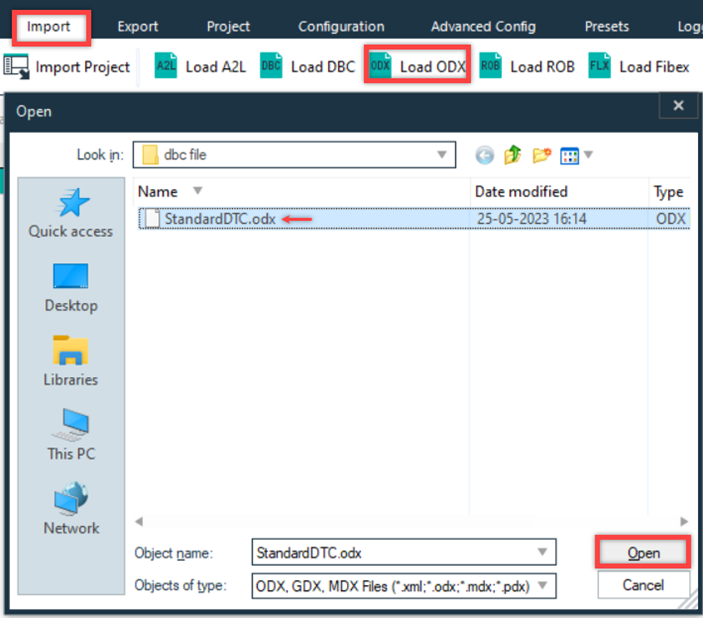
To add the PIDs, in the Import window, click 'Load ODX' and then click 'Open'.
#### Or
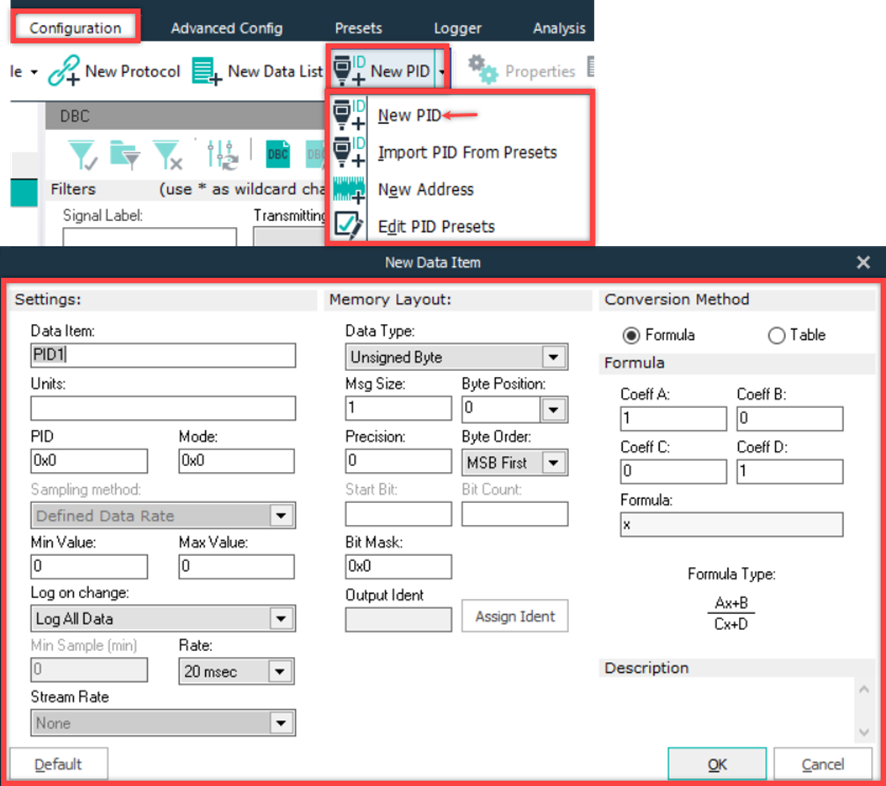
Manually add PIDs by clicking the 'New PID' option in the 'Configuration window' and clicking 'OK' after specifying the details.
Connect the Rebel data logger using a USB cable.
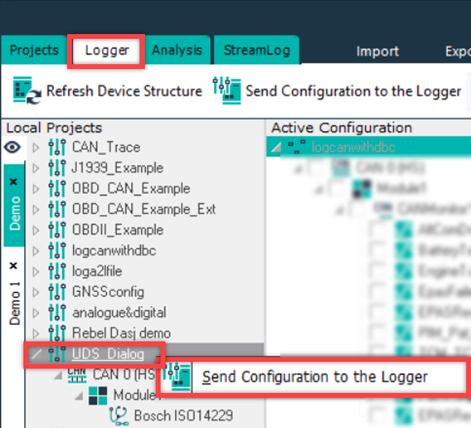
Identify the configuration and right-click to display the menu. Click 'Send Configuration to the Logger'.
Select 'Yes' to continue.

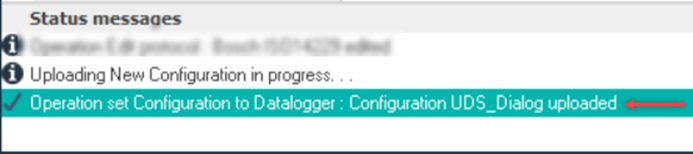
Wait whilst the processing is complete

The logger is reconfigured once the processing is complete.
---
# Agent Instructions
This documentation is published with GitBook. GitBook is the documentation platform designed so that both humans and AI agents can read, navigate, and reason over technical content effectively. Learn more at gitbook.com.
## Querying This Documentation
If you need additional information that is not directly available in this page, you can query the documentation by asking a question.
Perform an HTTP GET request on the following URL with the `ask` and `goal` query parameters:
```
GET https://docs.influxtechnology.com/support_guides/dialog-user-guide/quick-start-guide/log-data-using-uds-in-dialog-software.md?ask=&goal=
```
`ask` is the immediate question: it should be specific, self-contained, and written in natural language.
`goal` is what the user is ultimately trying to achieve, the reason they need the answer. Sharing it helps GitBook give you a better, more relevant answer. A goal is most helpful when it describes the outcome the user wants rather than restating the question. For example, with `ask=how do I create an API token`, a goal like `automate deployments from our CI pipeline` lets GitBook tailor the answer to that use case.
The response will contain a direct answer to the question and relevant excerpts and sources from the documentation.
Use this mechanism when the answer is not explicitly present in the current page, you need clarification or additional context, or you want to retrieve related documentation sections.