# StreamLog Initialisation- User Guide
#### Step 1
Load the SSF file shared in the Dialog 5.3 software.
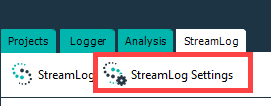
Click on the 'StreamLog Settings' tab
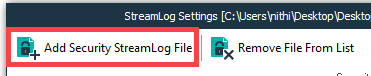
Click on the 'Add Security StreamLog File' tab.
#### Step 2
After loading the ssf file, connect to the server; in the login prompt, use the administrator and leave the password empty.
#### Step 3
Create a new project.
#### Step 4
Open the Administrator Menu.
#### Step 5
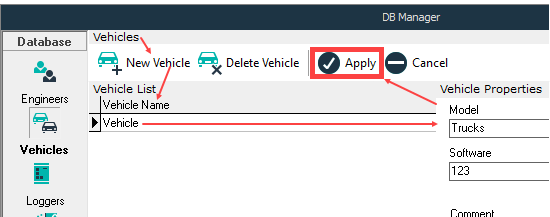
Open the 'Vehicles' Tab
* Click 'New Vehicle'.
* Enter details under 'Vehicle Name'.
* Enter the vehicle details on the right side and click 'Apply'.
#### Step 6
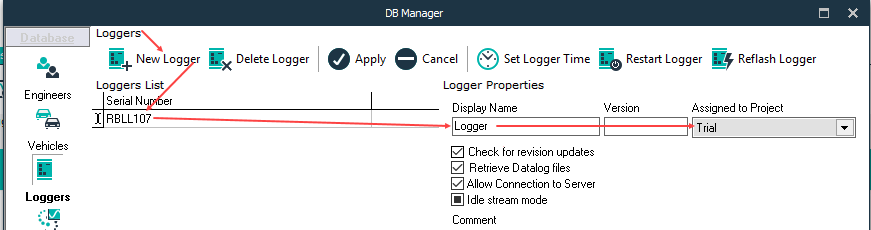
Click on the 'Loggers' tab.
* Select 'New Logger'.
* Enter the exact logger serial number without spaces.
* Enter a logger's display name
* Assign the logger to the project which was created in the first step.
#### Step 7
Connect the logger to the laptop via USB to configure the server setting in the logger.
The Dialog software will automatically switch to the 'Logger' tab on connecting the logger.
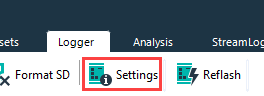
#### Step 8
Click on Logger 'Settings' tab.
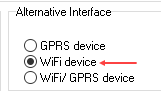
#### Step 9
Choose the interface that will be used to connect to the Streamlog server.
Select the interface and click update.
#### Step 10 (If using GPRS interface, if using WiFi, skip to Step 11)
Click on the 'GPRS Settings' tab.
* Enter the APN setting for the SIM card inserted in the logger.
* Enter the user ID and password for the APN if required.
* Select the region;
* Click on “load streamlog link settings from ssf file” to auto-load the server IP.
* Click Update.
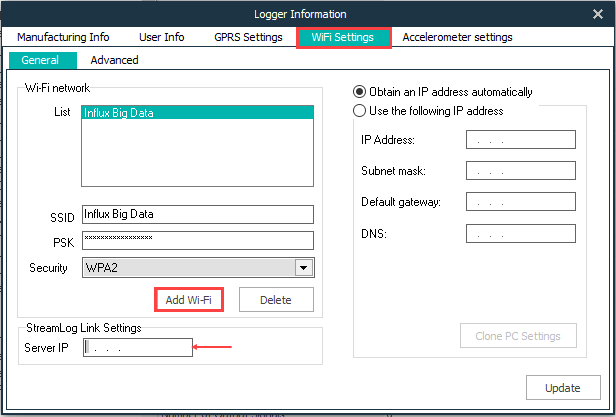
#### Step 11
Click on 'WiFi Settings'.
* Click 'Add WiFi' and add your WiFi network.
* Enter the Server IP provided in the Email.
* Click 'Update'.
* The logger and server are now ready to receive configuration over the air.
* You can prepare and send the configuration to the server.
* Connection to the server can be tested using the streamlog assistant software, which can be found in the start menu. Make sure Dialog is closed while using this tool. Provide 12V power to the logger and connect the Antenna to the logger. Open the software and click Check GPRS connection or Check WiFi connection based on your user interface.